Creating an LDAP Service Account
In order for some services to connect to the LogonBox Directory, it is recommended that you create a dedicated service account with just the rights needed to search the user directory.
Create a new account in your LogonBox Directory, giving it a suitable name, for example, I will use in the following configuration serviceAccount as the username.
Goto User Directory menu and click the Create button at the bottom of the table. Enter the username and provide a description in the Fullname field to identify the account later. Set the password in the Password tab.
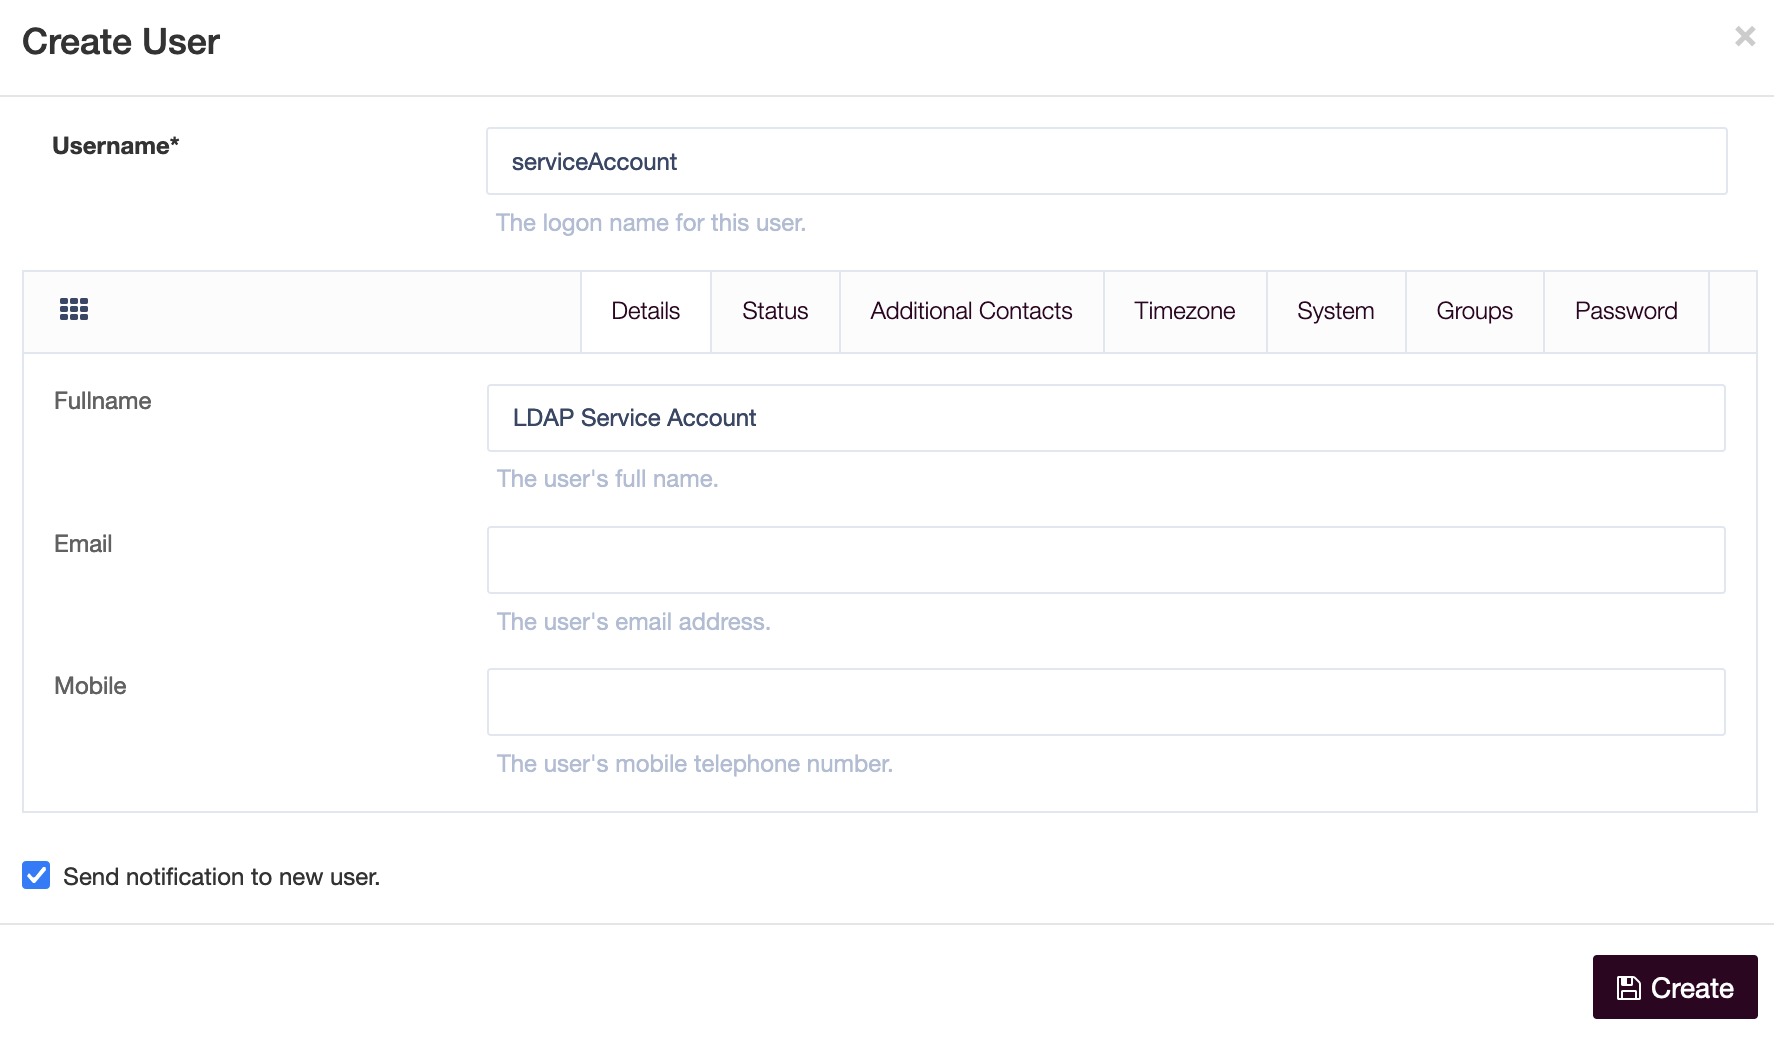
Save the user and take a note of the password you have set.
Next, go to the Security and Permissions menu in your LogonBox Directory and create a new Role, called Service Account. Add the user you just created to it in the Users field in the Principals tab.
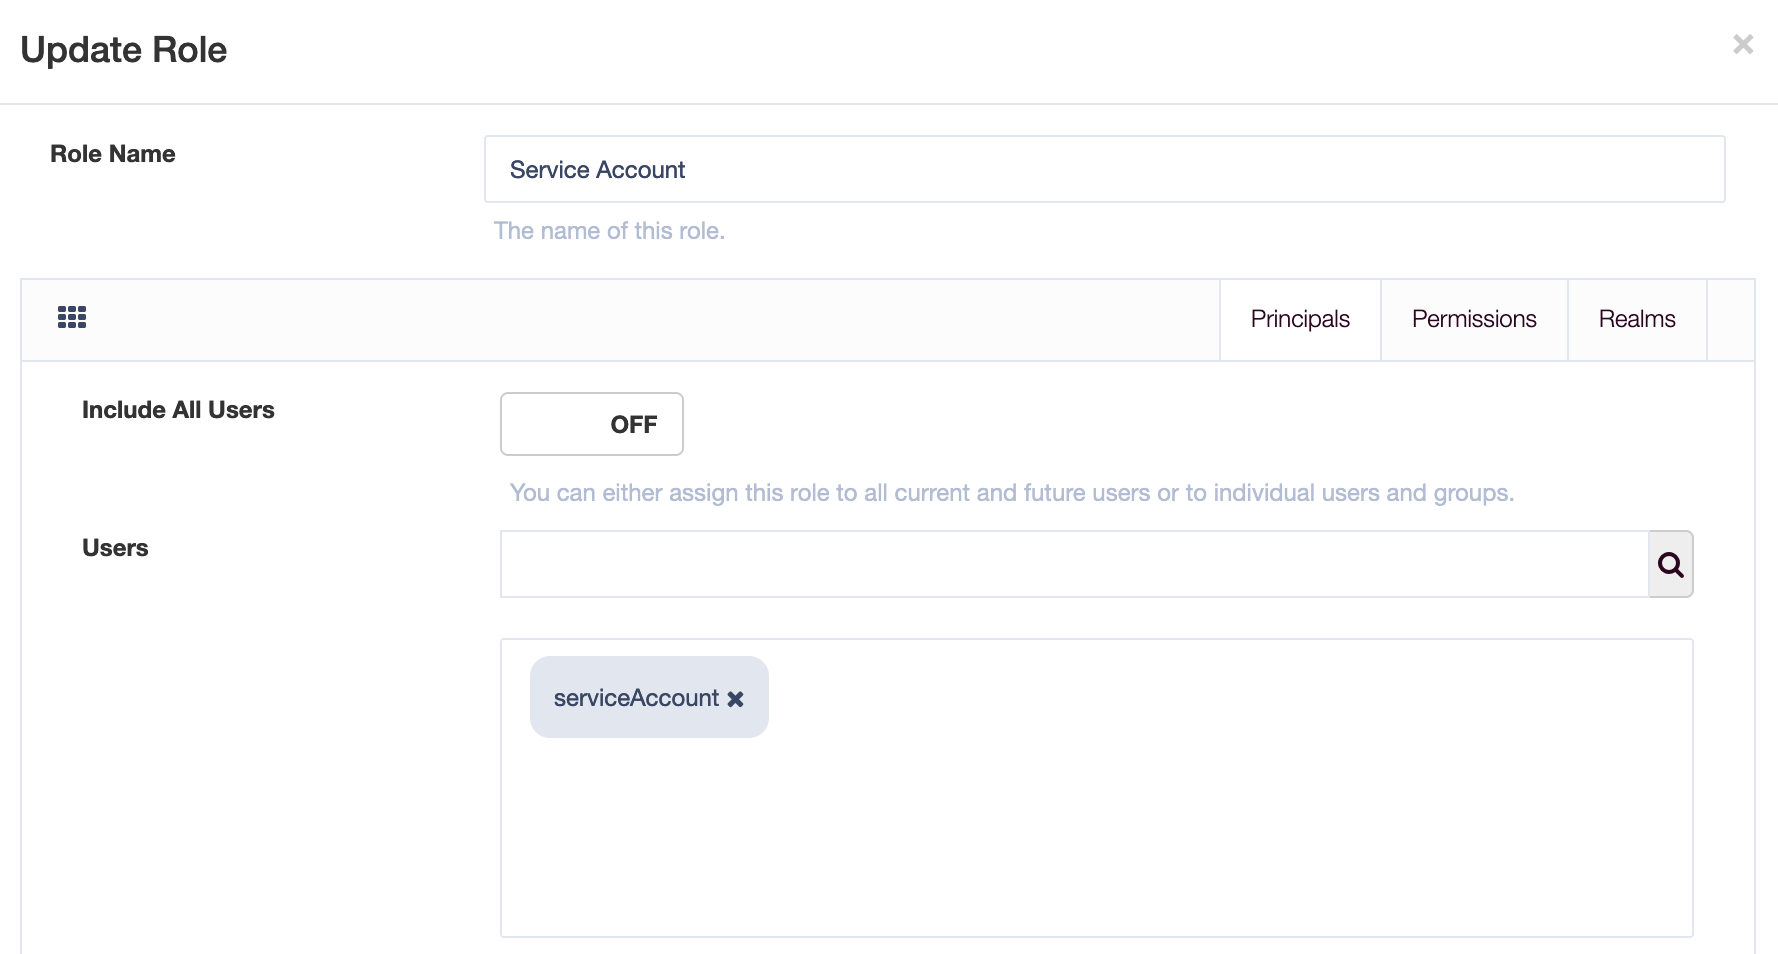
Under the Permissions tab, add the LDAP Read permission and save the Role.

You now have a service account that can be used for reading information from the LDAP.
Determining the service account DN
In order to connect via LDAP, you will need to know the DN for the service account user.
First, get the base DN, which you can see on the Dashboard->Server Status page.

Using this above example, your service account DN will be cn=serviceAccount,cn=Users,dc=demo,dc=logonbox,dc=directory.
