Introduction
pGina is a pluggable, open-source credential provider that enables you to log into Windows using LDAP credentials. This article shows you how you can install and configure pGina so that you can log into your Windows computer using LogonBox Directory credentials.
If you have not installed LogonBox Directory, now is the time to do so. This discussion assumes you have a server installed, configured, and ready to go with users waiting to log into Windows.
Installing pGina
Head over to the pGina website at http://pgina.org/ and download. I am installing the 3.2.4.0 version, which, while marked as unstable, appears to have been in use since 2014. This version also supports TLS for LDAP connections so we can ensure our communication remains private.
Run the installer, accepting all the usual prompts such as software license and installation directory. When it asks you to choose components, mark the "Visual C++ redistributable package" option to install it.
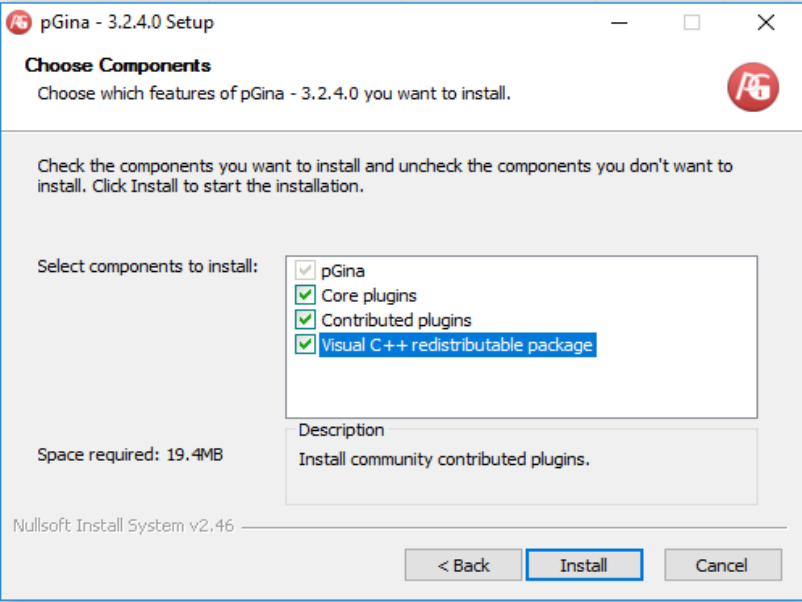
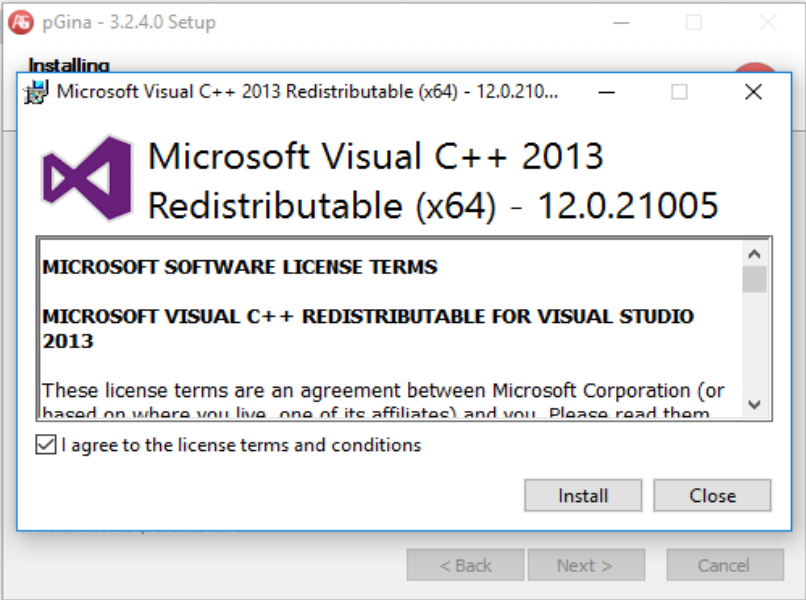
Other than another prompt to accept another software license for the Visual C++ redistributable package, everything should proceed, and you should have completed the installation of pGina.
pGina Configuration
Navigate to the installation directory and start the pGina.Configuration command. It should look something like this.
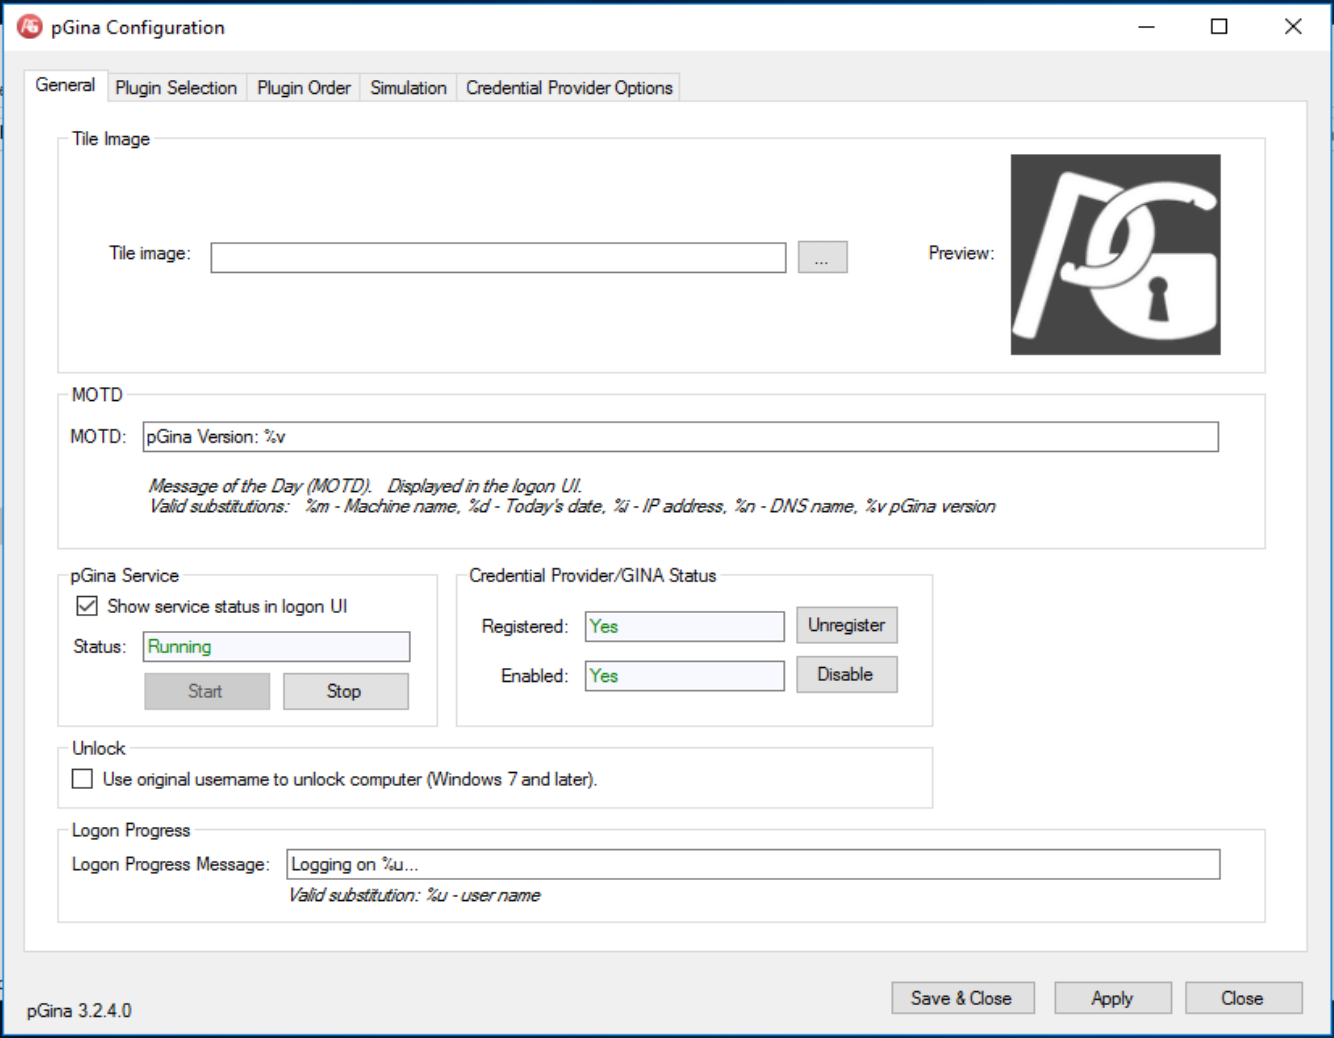
It's worth checking that the service status is showing as Running.
Before you head off configuring pGina to connect to your directory there is a few values you will need to jott down. These are:
Directory Hostname
This will be the FQDN of your LogonBox Directory. This hostname must be resolvable from each client you install pGina on. If your users will be accessing the directory via the Internet then make sure you have firewalled and port-forwarded the directory from your public hostname/IP address.
Directory LDAP DN
The LDAP Distinguished Name is a uniquely formatted string that provides a way to resolve elements in the LDAP. You will need to know the root DN of your server. If you have not changed this, then it will be DC=System,DC=local.
Directory LDAP Port
Unless you have changed the default LDAPS interface, the port value will be 636 for the ldaps:// protocol.
Service Account
You will need an account that has permission to search the LDAP. We recommend creating a specific user with a minimal set of permissions. See our Creating a Service Account article for more information.
LDAP Configuration
In the plugin selection tab, highlight the LDAP plugin in "Current Plugins" and ensure Authentication and Authorization options are checked (see image).
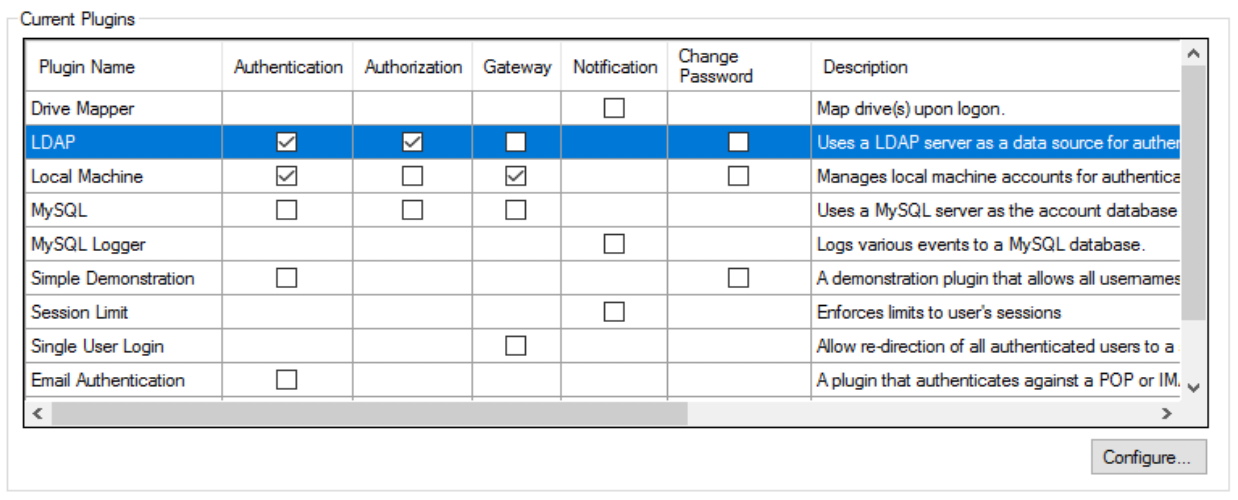
Now click on Configure
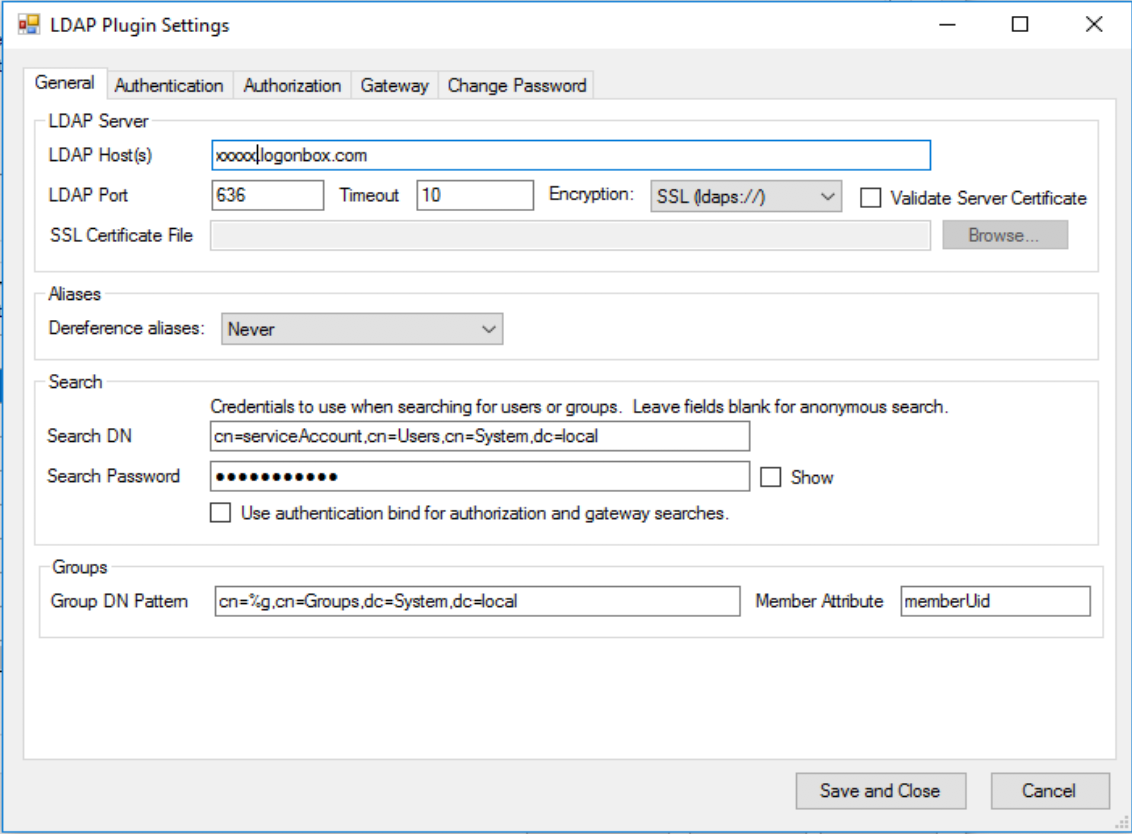
There are a number of items here to configure. Using the information you have already ascertained. Complete the following fields.
LDAP Host: <Your LogonBox Directory FQDN>
LDAP Port: 636
Encryption: SSL (ldaps://)
Assuming you did not change the server DN and you created the service account as above then enter the full DN of the service account in the Search DN field.
Search DN: CN=serviceAccount,CN=Users,DC=System,DC=local
Search Password: <The password for your service account>
Whilst this discussion does not concern itself with group membership, you can set the Group DN pattern to CN=%g,DC=Groups,DC=System,DC=local in case we come back to this in a future discussion.
Now change to the Authentication Tab, here you just need to provide the User DN Pattern field value. Again assuming nothing changed with the root DN we can use the value [CN=%u,CN=Users,DC=System,DC=local](https://)

Testing Configuration
In the pGina Configuration tool, click the Simulation tab. Enter the name and password of a LogonBox Directory user in the username and password fields. NOTE: This user does not have to have an account on Windows, the account will be created by pGina when you successfully log in.
Click on the green play icon to simulate the logon.
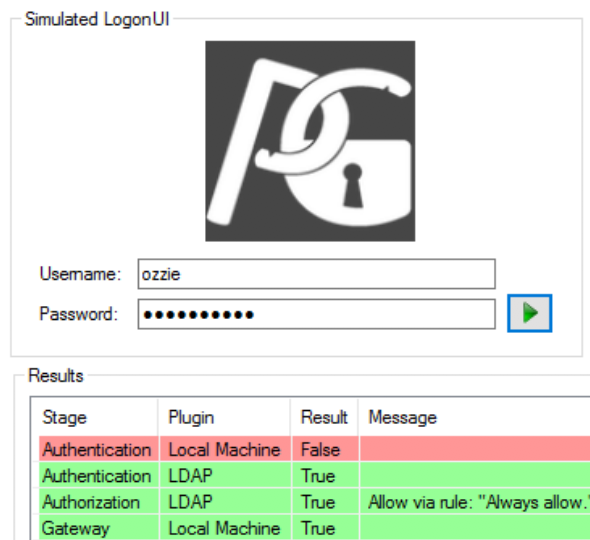
If you have everything configured correctly you should see a result similar to the image. Don't worry if the Local Machine state returned false, that just means there is no account for the user currently on the machine. If you see a successful Authentication, Authorization, and Gateway to LDAP plugin like this image shows, then you should be ready to test a real Login.
Logging In
You can now close out all the configuration pages, selecting to Save if it prompts. And log out of Windows. First thing you will notice the logon UI has changed.

Enter the credentials of any of your LogonBox Directory users. If you have followed everything above correctly then they will be logged into Windows and you have your first win using LogonBox Directory!
